Wallpaper Borders can provide an extremely sophisticated and elegant look to your home. They have the unique ability to give your room that personal touch. The actual process of applying the borders has never been easier, as almost all borders sold today are prepasted and can be applied on painted walls or directly over coordinated wallpapers for a real Designer look. Here are the steps to follow for a beautifully bordered room.
| Step 1: Planning The first consideration is where the border will be applied. Will you use it along the ceiling, as a chair rail or to frame your doors and windows for an architectural effect? A rough sketch can help you visualize where a border would look best. Once you have determined where the border will be used its time to gather your paint, carpet, wallpaper and fabric samples to take your local dealer to select the perfect border. |
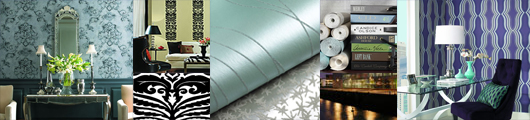
Step 2: How many spools of a border will I need? This next step is a simple one; take the sketch you made and place the measurements of your room accordingly. Most of the borders come packaged in 5 yard spools (15 feet) this is to accommodate the average wall length without a seam. To make your job go quicker and look more professional I suggest that you order a spool for each wall. If you are planning to install a border around the windows and doors, allow yourself at least 2 feet extra for each door and 4 feet extra for each window to allow for mitering the corners. It is always best to over estimate your requirements, any extra material can be used to decorate notebooks, lampshades, waste baskets, storage bins, dresser drawers, headboards, backs of book shelves, picture frames, hat boxes, toy boxes, did I mention everything? This next step is a simple one; take the sketch you made and place the measurements of your room accordingly. Most of the borders come packaged in 5 yard spools (15 feet) this is to accommodate the average wall length without a seam. To make your job go quicker and look more professional I suggest that you order a spool for each wall. If you are planning to install a border around the windows and doors, allow yourself at least 2 feet extra for each door and 4 feet extra for each window to allow for mitering the corners. It is always best to over estimate your requirements, any extra material can be used to decorate notebooks, lampshades, waste baskets, storage bins, dresser drawers, headboards, backs of book shelves, picture frames, hat boxes, toy boxes, did I mention everything? |
| Step 3: What tools will I need? You will need just a few tools to do the job, some you may already have and those you don’t have, you may acquire from your wallpaper retailer. Here is a list of what you will need.1. An all-in-one step border prep such as PREPZ™ from Zinsser or Border-Ease® from Roman Decorating Products. These products make border hanging quick and easy by eliminating the need for sizing, special adhesives and messy water trays. Specifically formulated to work over both painted walls and vinyl wallpaper, PREPZ strengthens the paste on pre-pasted borders to enhance adhesive performance, preventing curling edges, corners and seams. It also provides extra “slip” so there’s more time to position and match patterns. PREPZ will not stain paint or wallpaper, like other adhesives can, and it makes removal easier at redecorating time. The convenient, patented sponge applicator allows you to simply roll PREPZ on the back of pre-pasted borders and hang. Plus, clean up is a snap with a sponge and water. In the event your border is unpasted, use will need to use a vinyl-over-vinyl adhesive. 2. Tape measure, level or chalk line: Use a tape measure to determine length of border needed. If hanging the border mid wall, mark the height and use a level or chalk line to ensure horizontal placement and positioning is correct. 4. Sponge and pails: The sponge is used to smooth out the border and remove excess paste. Two pails are needed; one for paste (if required) and one for clean water for rinsing the sponge. Be sure to change this water frequently. 5. Pasting / Work table: Make sure you set up a large area for cutting, pasting and folding your wallpaper and borders – a large kitchen table or a long work table with a plastic cover will work. |
| Step 4: Where to start? Now to start the finishing touch, after the walls are wallpapered or painted and properly prepared, you want to start the border in an inconspicuous spot. If installing your border as a chair rail start at one side of a door or window frame and end at the other side. If installing at the ceiling start at a corner over a doorway as you enter the room, or in the darkest corner so that any design mismatch is less obvious. |
Step 5: Let’s begin! Measure the first wall as determined by step 4, then measure and cut the border allowing 2 inches extra to allow for 1-inch overlap at each corner. Remember measure twice and cut once! Begin applying paste or activator and Book the border as you apply the adhesive. Booking means gently folding the border like an accordion, paste-to-paste. Be careful to not crease the border, as the creases will show. Once you have applied the adhesive, let the booked border sit for a few minutes,this allows the paper to relax making it easier to hang. Start hanging the strip allowing about a 2-inch overlap on the adjoining wall (see illustration below). Take a damp sponge and begin smoothing out any air bubbles or lumps as you go along. It’s best if you can have someone holding the border that is to be applied as you place the border in position. Measure the first wall as determined by step 4, then measure and cut the border allowing 2 inches extra to allow for 1-inch overlap at each corner. Remember measure twice and cut once! Begin applying paste or activator and Book the border as you apply the adhesive. Booking means gently folding the border like an accordion, paste-to-paste. Be careful to not crease the border, as the creases will show. Once you have applied the adhesive, let the booked border sit for a few minutes,this allows the paper to relax making it easier to hang. Start hanging the strip allowing about a 2-inch overlap on the adjoining wall (see illustration below). Take a damp sponge and begin smoothing out any air bubbles or lumps as you go along. It’s best if you can have someone holding the border that is to be applied as you place the border in position. |
Step 6: Dealing with corners Your house is constantly shifting and vibrating. Because of this, it is recommended that you run your next strip directly into the corner overlapping the prior strip by 1 to 2 inches using vinyl-to-vinyl adhesive or quality white glue. Outside corners can simply be wrapped. |
Step 7: Dealing with Seams Planning ahead will help minimize seams but if you find that it cannot be avoided, the best method to handle seams is to overlap both ends of the border about 2 inches and carefully match up the pattern. Take a new blade and carefully cut through both pieces of the border where it overlaps using the straight edge as a guide. Then carefully peel away the extra material and you will be left with an almost invisible seam. If applying a wide border a seam roller is recommended to smooth out the seam, but be careful not to press too hard. Planning ahead will help minimize seams but if you find that it cannot be avoided, the best method to handle seams is to overlap both ends of the border about 2 inches and carefully match up the pattern. Take a new blade and carefully cut through both pieces of the border where it overlaps using the straight edge as a guide. Then carefully peel away the extra material and you will be left with an almost invisible seam. If applying a wide border a seam roller is recommended to smooth out the seam, but be careful not to press too hard. |
Step 8: The chair rail As you can see in the illustration, chair rails are normally positioned about 1/3 of the distance from the floor to the ceiling. The general rule of thumb is 32 inches to the center of the border. Chair rails help give a cozier feeling to a room with high ceilings and in a child’s room they provide an interesting, eye-level visual stimulus. As you can see in the illustration, chair rails are normally positioned about 1/3 of the distance from the floor to the ceiling. The general rule of thumb is 32 inches to the center of the border. Chair rails help give a cozier feeling to a room with high ceilings and in a child’s room they provide an interesting, eye-level visual stimulus. |
Step 9: Borders around windows and doors When installing a border around a window or door it’s customary to work from left to right much the same as we read. This has a more comfortable feel as the pattern runs up the left side, across the top, and down the right side of the frame. To properly install a border around a frame you simply overlap the two ends (see illustration). You then line up your straight edge with the inside corner and the outside corner formed by the overlapping border (this is normally a 45 degree angle), then using a new blade cut through both layers of the border and gently remove the excess material. When installing a border around a window or door it’s customary to work from left to right much the same as we read. This has a more comfortable feel as the pattern runs up the left side, across the top, and down the right side of the frame. To properly install a border around a frame you simply overlap the two ends (see illustration). You then line up your straight edge with the inside corner and the outside corner formed by the overlapping border (this is normally a 45 degree angle), then using a new blade cut through both layers of the border and gently remove the excess material. |
| Step 10: The best part! Sit back and admire your newly decorated room! |
All designer wallpapers and fabrics can be purchased through Eade’s Wallpaper & Fabric 1-877-229-9427 www.eadeswallpaper.com
